Spring is in the air! And while my family does not enjoy the pollen (and allergies) it brings, I find myself thinking of DIY projects and recipes I want to make while we enjoy the outdoors.
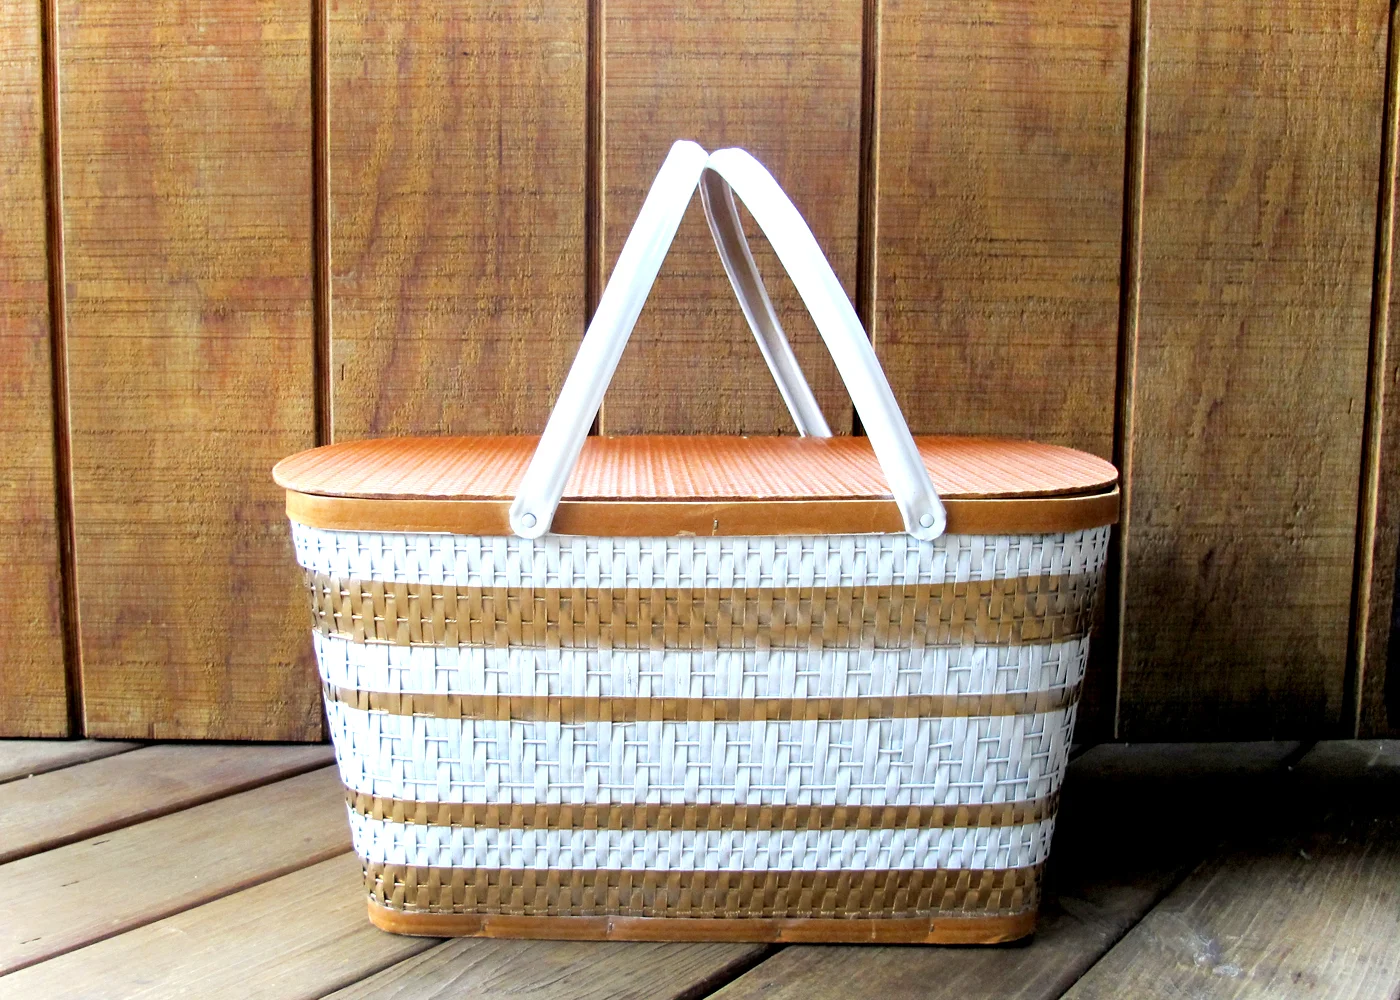
The idea for this DIY painted picnic basket came about while walking up and down the halls of a huge antique mall. I spotted a vintage green basket for $10 and right away knew I would make it over. This project is super easy and the supply list is short (spray paint and painter's tape). Scroll down for the supply list and directions!

This article contains affiliate links, you can read my full disclosure here.
Spray Painted Vintage Picnic Basket
Supplies
Vintage Basket (check thrift stores, antique malls, or online via Etsy or Ebay)
White all in one Spray Paint
Rust-Oleum Gold Metallic Spray Paint

Step 1:
Cover areas of basket you want to leave unpainted with painter's tape. I covered the bottom edge, top edge, and lid. I also taped handles up for the initial coat of white spray paint.

Step 2:
Spray basket with long straight coats of paint, starting a bit from the edge and going across. Turn basket until entire basket is covered.
Wait at least 3 hours to dry (varies based on humidity).

Step 3:
After white paint is completely dry, take fresh blue tape and before applying to basket, touch tape to shirt or pants to reduce its tackiness (this will prevent the white paint from peeling). Create the design of your choice with painter's tape. I chose stripes, the lines of the basket make it very easy to tape off straight lines.
Immediately after spraying the gold paint, carefully remove all painter's tape. Let dry at least 1 hour.

The result is fun and cheerful. There were definitely a few spots of imperfection, and it adds to the charm of a vintage basket. You could easily try this in different colors and styles. I am already thinking a polka dot basket would be a nice companion!
